Below the Waterline: Corrosion, Antifouling, and Bottom Maintenance
Below the Waterline - practical insights for the bluewater cruiser.
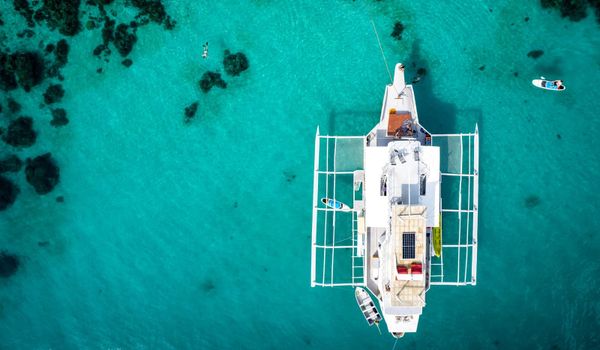
Everything below the waterline is trying to fail. The ocean is the most corrosive environment on earth — a warm, salty, electrically conductive solution teeming with organisms that want to colonize every submerged surface on your boat. Left unmanaged, corrosion eats your metals, osmotic blistering destroys your laminate, and marine growth turns your hull into an underwater reef that adds drag, slows you down, and fouls your systems.
Bottom maintenance isn't glamorous. Nobody posts Instagram photos of themselves sanding antifouling paint in a boatyard at 0700 in 35-degree heat. But it's the work that keeps the boat moving, the through-hulls intact, and the propeller turning. Here's what you need to know.
Corrosion: The Invisible Destroyer
Marine corrosion comes in several forms, and understanding which ones threaten your boat determines your protection strategy.
Galvanic corrosion occurs when two dissimilar metals are connected in the presence of an electrolyte (saltwater). The less noble metal (the anode) corrodes preferentially, sacrificing itself to protect the more noble metal (the cathode). This is the electrochemistry behind every corroded zinc, every pitted bronze through-hull, and every dissolving aluminum outdrive in the marina.
The galvanic series ranks metals by their electrical potential in seawater. At the noble (protected) end: stainless steel, bronze, copper. At the active (sacrificial) end: zinc, magnesium, aluminum. When dissimilar metals are in electrical contact underwater — say, a stainless steel prop shaft in a bronze cutlass bearing — the less noble metal corrodes. This is predictable and manageable, but only if you understand the pairings on your boat.
Stray current corrosion is galvanic corrosion supercharged by external electrical current — typically from faulty wiring, inadequate bonding, or the marina's electrical system. Stray current corrosion can destroy metal components in weeks rather than months. If your zincs are disappearing faster than expected, or if you notice unusual pitting on bronze or aluminum components, suspect stray current. Check your boat's bonding system and shore power connections, and test for DC voltage leakage between the bonding system and the water with a multimeter.
Crevice corrosion attacks metals in tight spaces where oxygen levels are depleted — under washers, in threaded fittings, between overlapping plates. Stainless steel, which depends on an oxide layer for corrosion resistance, is particularly vulnerable in crevices where that oxide layer can't reform. This is why stainless steel fasteners below the waterline occasionally fail catastrophically despite appearing fine on the surface — the corrosion happens where you can't see it.
Sacrificial Anodes: Your First Defense
Sacrificial anodes (zincs, or more accurately, anodes — since magnesium and aluminum alloys are also used) protect the metals on your boat by corroding preferentially. They work by being the least noble metal in the galvanic circuit, attracting the corrosion that would otherwise attack your prop shaft, rudder stock, through-hulls, and keel bolts.
Zinc anodes are the traditional choice for saltwater. They provide reliable, predictable protection in high-salinity water. In brackish or fresh water, zinc can passivate (form a non-conductive coating that stops the protective current), making it less effective.
Aluminum anodes work well in both salt and brackish water and provide more electrical capacity per pound than zinc. They're increasingly popular among cruisers who move between salt and brackish environments.
Magnesium anodes are designed for freshwater use only. In saltwater, they corrode too rapidly to provide sustained protection.
Inspect anodes at every haul-out and whenever you dive on the hull. Replace any anode that's more than 50% consumed. A fully consumed anode means there's been a period where your underwater metals had no protection — and you may already have damage you can't see.
Mount anodes in direct metallic contact with the components they protect, or connect them via the boat's bonding system (a network of heavy copper wire linking all underwater metals). The bonding system ensures that all protected metals are at the same electrical potential, preventing galvanic couples between your own components.
Antifouling Paint: Keeping the Bottom Clean
Marine growth on an unprotected hull begins within hours of launching. Within weeks, a biofilm forms. Within months, barnacles, tube worms, mussels, and algae colonize the surface. The performance penalty is severe — heavy fouling can increase drag by 40-60%, cutting boat speed, increasing fuel consumption, and making the boat sluggish and unresponsive.
Antifouling paint prevents this by releasing biocides (typically copper-based compounds) that discourage organism attachment. The paint is a consumable — it erodes or leaches over time, eventually losing effectiveness and requiring reapplication.
Ablative (self-polishing) antifouling works by gradually wearing away as the boat moves through the water, continuously exposing fresh biocide. It's the most popular choice for cruising boats because it provides consistent protection over time, and unused paint remains effective during layups. When the boat sits idle, ablation slows; when it's sailing, ablation resumes. This self-regulating property makes it forgiving for boats that alternate between periods of activity and rest.
Hard antifouling creates a durable coating that doesn't wear away. Biocide leaches from the paint surface over time. Hard antifouling is better suited to boats that are frequently hauled and pressure-washed (the hard surface cleans easily) and high-speed boats where ablative paint would erode too quickly. For cruising boats that stay in the water for 12-18 months between haul-outs, ablative is generally the better choice.
Copper content matters. Higher copper-content paints provide better antifouling performance in tropical waters, where growth pressure is intense year-round. Look for paints with copper content above 40% by weight for tropical use. Lower copper-content paints may suffice in temperate waters.
Apply antifouling paint per the manufacturer's instructions — surface preparation is everything. Clean the hull to remove all old flaking paint, sand to provide a mechanical key, apply the recommended primer if changing paint systems, and apply the specified number of coats with proper drying time between coats. Add an extra coat at the waterline, the leading edge of the keel, and around through-hulls — these areas experience the most growth pressure.
Osmotic Blistering
Osmosis is the slow migration of water through the gelcoat into the fiberglass laminate. Over years, water accumulates in the laminate, reacts with residual chemicals in the resin, and forms acidic blisters between the gelcoat and the structural layers. Osmotic blistering is ugly, progressive, and — if left untreated — can compromise structural integrity.
Prevention is far easier than cure. An epoxy barrier coat (typically two or more coats of solventless epoxy) applied below the waterline before the antifouling provides a moisture barrier that dramatically slows water ingress. Many new production boats are delivered without this barrier coat — applying one at the first haul-out is cheap insurance.
If blisters are already present, the repair involves grinding out the blistered gelcoat, drying the laminate thoroughly (this can take weeks to months in a covered, ventilated environment), filling with epoxy fairing compound, and applying an epoxy barrier coat before re-painting. It's labor-intensive and time-consuming but necessary if the problem is progressing.
The Haul-Out Routine
Most cruising boats haul out every 12-18 months for bottom maintenance. The routine should include:
Pressure wash the hull immediately after hauling — growth comes off much easier before it dries. Inspect the hull for blistering, gelcoat damage, and any areas where antifouling has worn through to bare laminate. Inspect all through-hulls, the prop shaft, rudder stock and bearings, cutlass bearing, keel bolts (if accessible), and the prop. Check and replace sacrificial anodes. Sand or scrape any hard growth that the pressure wash missed. Fair any damage with epoxy. Apply barrier coat if needed. Apply antifouling per the manufacturer's specifications.
Document everything with photos. Over multiple haul-outs, the photographic record reveals trends — areas of consistent heavy growth, spots where paint wears first, early signs of osmosis, and anode consumption rates that tell you about your boat's galvanic environment.
Diving Between Haul-Outs
In tropical waters, you'll need to clean the bottom between haul-outs. A monthly scrub with a soft brush (not a scraper, which removes antifouling paint) keeps growth manageable and maintains boat speed. Pay special attention to the waterline, the prop, the rudder, and the leading edge of the keel — these areas foul first.
Inspect anodes, through-hulls, and the cutlass bearing while you're down there. A quick underwater inspection every month catches problems early — a weeping through-hull, a loose anode, a prop ding that's creating vibration — before they become emergencies.
The bottom of your boat is the part you see least and the part that demands the most consistent attention. It's not exciting work. But it's the work that keeps everything above the waterline moving.
References: Nigel Calder's Boatowner's Mechanical and Electrical Manual, West Marine, Practical Sailor antifouling paint tests, International/Hempel/Jotun manufacturer guidelines